Request Quote
Insertion valves are essential components in high-pressure systems that require maintenance, providing a reliable method for controlling flow without requiring a complete system shutdown. However, the effectiveness and safety of an insertion valve depend entirely on a precise and meticulous installation process. An improper installation can lead to leaks, equipment failure, and significant safety hazards.
This guide provides a detailed and practical overview of the entire installation process, giving you the info you need to put an insertion valve into your high-pressure system. Understanding these steps will be essential for ensuring the operational safety and efficiency of your facility.
A successful and safe insertion valve installation begins with having the right tools and equipment. Each item plays a critical role in ensuring the valve is fitted correctly and can withstand the demanding conditions of a high-pressure environment.
Using high-quality, properly calibrated tools is not just a matter of efficiency; it is a fundamental safety requirement. Here’s a quick overview of the essentials you should have access to.
Working with high-pressure systems introduces significant risks. That’s why comprehensive personal protective equipment (PPE) is mandatory. This includes safety glasses or a face shield, reinforced gloves, steel-toed boots, and flame-resistant clothing. Additionally, make sure pressure monitoring devices and emergency shutdown controls are readily accessible to mitigate potential hazards from sudden pressure releases.
Thorough preparation is the foundation of a successful insertion valve installation. This phase involves all the steps needed to ensure that the actual installation goes off without a hitch.
The first step is a detailed assessment of the existing system. This involves identifying the correct type and size of insertion valve that matches the system’s specifications, including pressure ratings, flow characteristics, and fluid compatibility.
It is also crucial to inspect the pipeline for any signs of wear, corrosion, leaks, or other pre-existing issues. Doing this now will help prevent complications and ensure the new valve functions properly.
Since safety is a primary concern during the shutdown phase, you’ll want to fully depressurize the system and completely isolate the specific section where you plan to install the valve. This process involves closing upstream and downstream valves, venting any trapped pressure, and verifying that the section is at zero pressure before any physical work begins.
Using lockout/tagout procedures is essential to prevent accidental re-pressurization while work is in progress. Double-checking that the shutdown is complete eliminates the severe risks associated with high-pressure leaks.
Once you’ve safely isolated the system, you’ll need to thoroughly prepare the connection points. This includes cleaning the pipe surface to remove any dirt, rust, or debris that could interfere with a proper seal. A clean, smooth surface is critical for ensuring the gaskets or sealants create a leak-proof connection.
Finally, carefully review the manufacturer’s guidelines for the insertion valve. This step confirms that the valve is compatible with the system and that you’ve met all procedural requirements for installation.
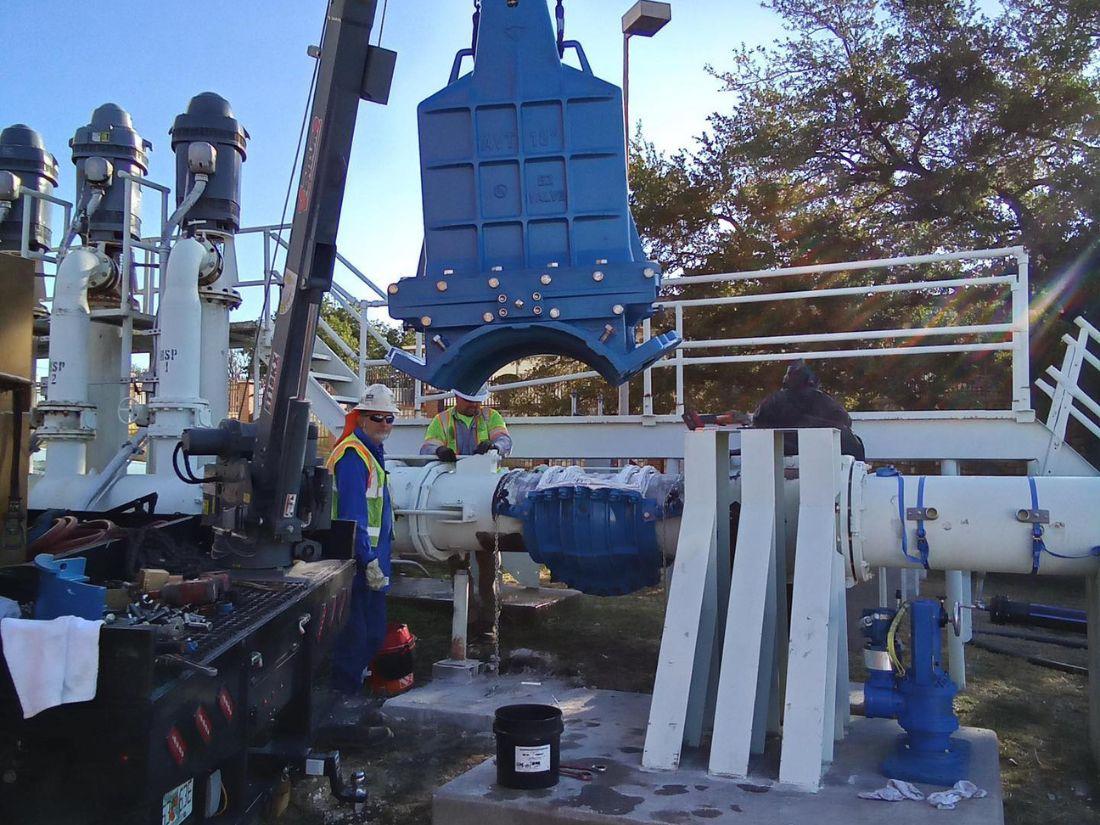
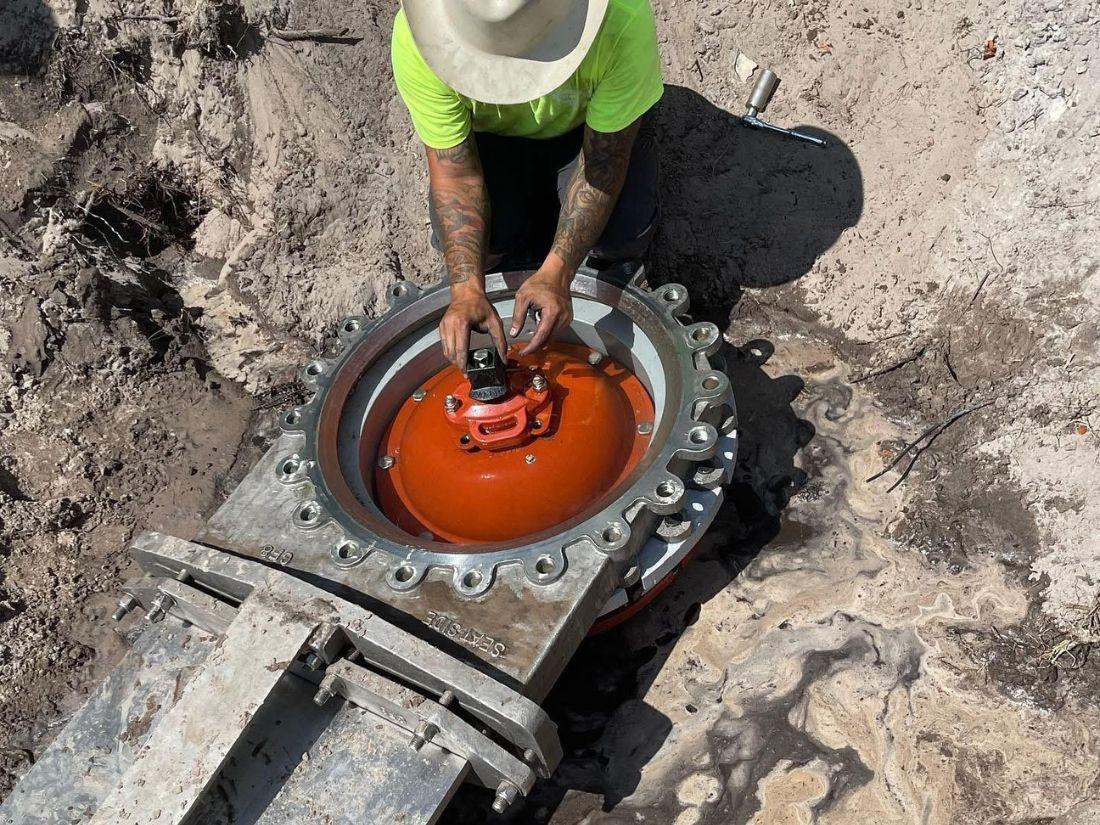
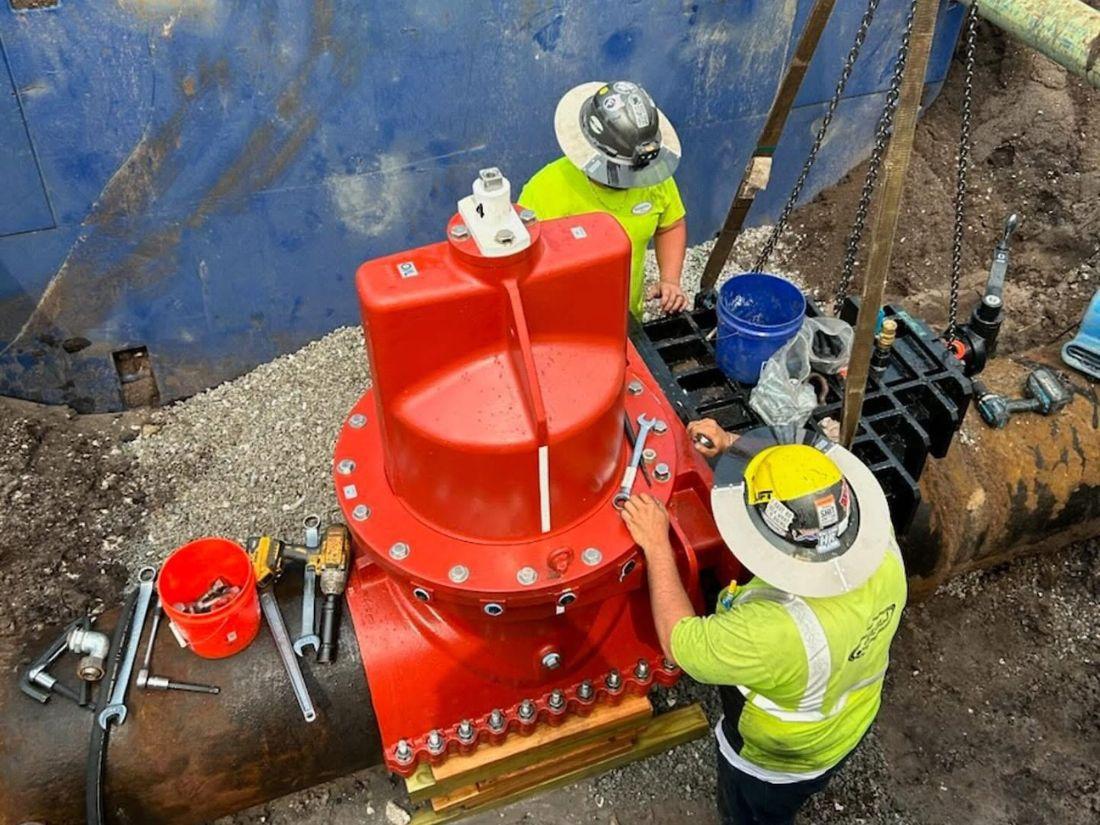
With the system ready, the focus shifts to the physical installation of the valve. Precision is key during this stage, as even minor deviations can compromise the integrity of the connection and the performance of the valve.
Proper alignment is critical for precise flow control and for minimizing stress on the pipeline and valve connections. Specialized alignment tools will help you position the valve correctly relative to the pipe’s centerline.
Once aligned, apply sealants or fit gaskets as specified by the manufacturer. It is important to use materials that are rated for the system’s maximum pressure and temperature to ensure a durable, long-lasting seal.
After alignment, you’ll need to securely fasten the valve. This is a multi-step process that requires careful attention to torque specifications. Tighten the fastening bolts in a specific order, usually a star or crisscross pattern, to ensure even pressure distribution across the flange.
Use a calibrated torque wrench to apply the exact amount of force recommended by the manufacturer. Over-tightening can stress the valve body and bolts, leading to potential failure, while under-tightening will result in leaks.
Once you’ve secured the valve, you’ll be able to carefully bring the system back online. Re-pressurization should be a gradual process, allowing the system to stabilize and giving you the time to identify any potential leaks while still at lower pressures.
Slowly reintroduce pressure while closely monitoring the valve and connections for any signs of leakage, and use pressure gauges to test the valve’s performance and ensure it is regulating flow correctly. You might need to make minor adjustments to optimize performance and guarantee a leak-free seal under full operational pressure.
Even with careful planning, issues can arise during or after installation. Being able to identify and address these problems quickly is essential for maintaining system safety and performance.
Symptoms of an installation error often appear during the re-pressurization and testing phase. Leaks, however small, are a clear sign of a problem and are often caused by misalignment or an improper seal.
Irregular pressure readings or difficulty operating the valve can also indicate an issue. If you observe any of these symptoms, you’ll need to depressurize the system again to identify and resolve the mistake. This may involve re-aligning the valve, replacing a gasket, or re-torquing the fasteners.
Sometimes, issues are related to the broader system rather than the installation itself. Persistent high-pressure surges, for example, can impact the performance and lifespan of any valve. If the valve malfunctions by failing to regulate flow or seat properly, it could be a sign of a deeper system problem or an issue with the valve itself.
In such cases, you’ll need to perform a thorough diagnosis. For complex or persistent issues, you should involve professional technicians who have the expertise to diagnose and resolve these challenges effectively.
For some businesses, the amount of work needed to install an insertion valve into a high-pressure system may be beyond their capabilities. Whether it’s from a lack of skills and tools or simply due to the fear of making things worse, calling the professionals is often the right call for many businesses.
Not only does hiring experienced technicians provide access to specialized knowledge and advanced tools—it also gives you peace of mind. Professionals are trained to work in high-pressure environments and adhere to strict industry safety standards, minimizing the risk of accidents. If this sounds like something that you want to take advantage of, then Rangeline Group’s team of valve insertion contractors is here to help.